
Curating and Designing a Studio Space for Public Engagement

Designing an interactive, inviting, and functional workshop environment to engage makerspace visitors in electronics skills and topics.
STUDIO 24 Makerspace at the North Boulder Public Library was designed to be a responsive and adaptable makerspace with a rotating thematic focus e.g., “printmaking studio” or “fiber studio”, with each studio being accompanied by an artist-in-residence.
Printmaking studio Printmaking studio Fiber studio
My task was to curate an “electronics studio” environment at STUDIO 24. Historically, makerspace visitors have been less interested in the electronics studio area of the main library makerspace, often noting that it feels intimidating for beginners.
Electronics bench at main library Getting electronics supplies unpacked at STUDIO 24 An empty wall at STUDIO 24
One of the goals of curating this studio environment was to create a more inviting electronics workspace for new visitors, while sustaining the utility for experienced tinkerers.
Here are some of the ways I curated the studio environment to respond to this goal:
The Electronics Bench

A curated version of the "electronics bench" from the main library. This version kept at least one of all of the tools/materials one might need for an electronics project, and placed the rest in storage or tucked away elsewhere to reduce clutter.
I included some playful, educational zines about electronics from Dr. Lee Wilkins, and often propped them open to an interesting page and displayed real components alongside the zine.
Previously, this parts organizer had been labeled by hand, and the labels were beginning to fade and peel. I created these new labels and included some details that might not be necessary for an individual's bench, but can be helpful for a public space such as images of the component and sometimes a short "plain terms" description of the component.

Our Maker-in-Residence, Ayesha Wilson, created a fun and inspiring drop-in activity where visitors could solder a color-changing flower-shaped circuit board (that Ayesha designed!). We noticed in previous studios that drop-in activities were not often interacted with by visitors. I tried to make the activity more compelling by creating clear inviting signage that invites visitors to create, displaying the final product, and pre-packaging kits of materials using a scrapbook photo organizer.
French Cleat Wall
This wall is one of my favorite elements at STUDIO 24. Crafted by the extraordinary Robby Holb, it creates a space that's equal parts functional and beautiful. It's a great storage and display solution. The lower parts of the wall are easy to access, and the higher areas can be used for creating artistic/decorative displays or storing extra materials.

For electronics studio, I asked Robby to create soldering stations (inspired by a post from Tom Fox). These stations made it incredibly easy to set up for soldering workshops. I share more about these stations and how I've used them in this post.

This little element from our display brought my a lot of joy! Every week I propped open the beautiful book "Open Circuits" to a new page and displayed a real version of the element being dissected next to the book.
This shelf displayed some playful elements that are particularly appealing to young makers like a hand-cranked power generator, an "Energy Stick" that I use to teach circuitry basics to all ages, and a copy of "The Tinkering Workshop" accompanied by a curated kit of materials that correspond with the Art Machines activity from the book.
I share more about how I approached curating and displaying the Tinkering Workshop in this guest blog post on Wonderful Idea co.

Interactive Elements
Sprinkled throughout the french cleat wall were several playful, creative applications of electronics. This video shows a conductive pom-pom that changes the colors of the LED lights in a woven tapestry when squished, An illuminated headpiece created by Ayesha, Maxwell- an animatronic teaching tool from Botango, and progammable paper circuits from Chibitronic's Circuit Sketchbook. Instructions for interaction were either printed and displayed alongside the object, or facilitated by makerspace staff.
I also created magnetic versions of the Tinkering Studio's circuit blocks to display on the magnetic boards that line the hallways of STUDIO 24. It was helpful to have these easily accessible on the wall as they could be quickly picked up and used to help visitors explore circuitry concepts using a tinkering approach.
What didn't work?
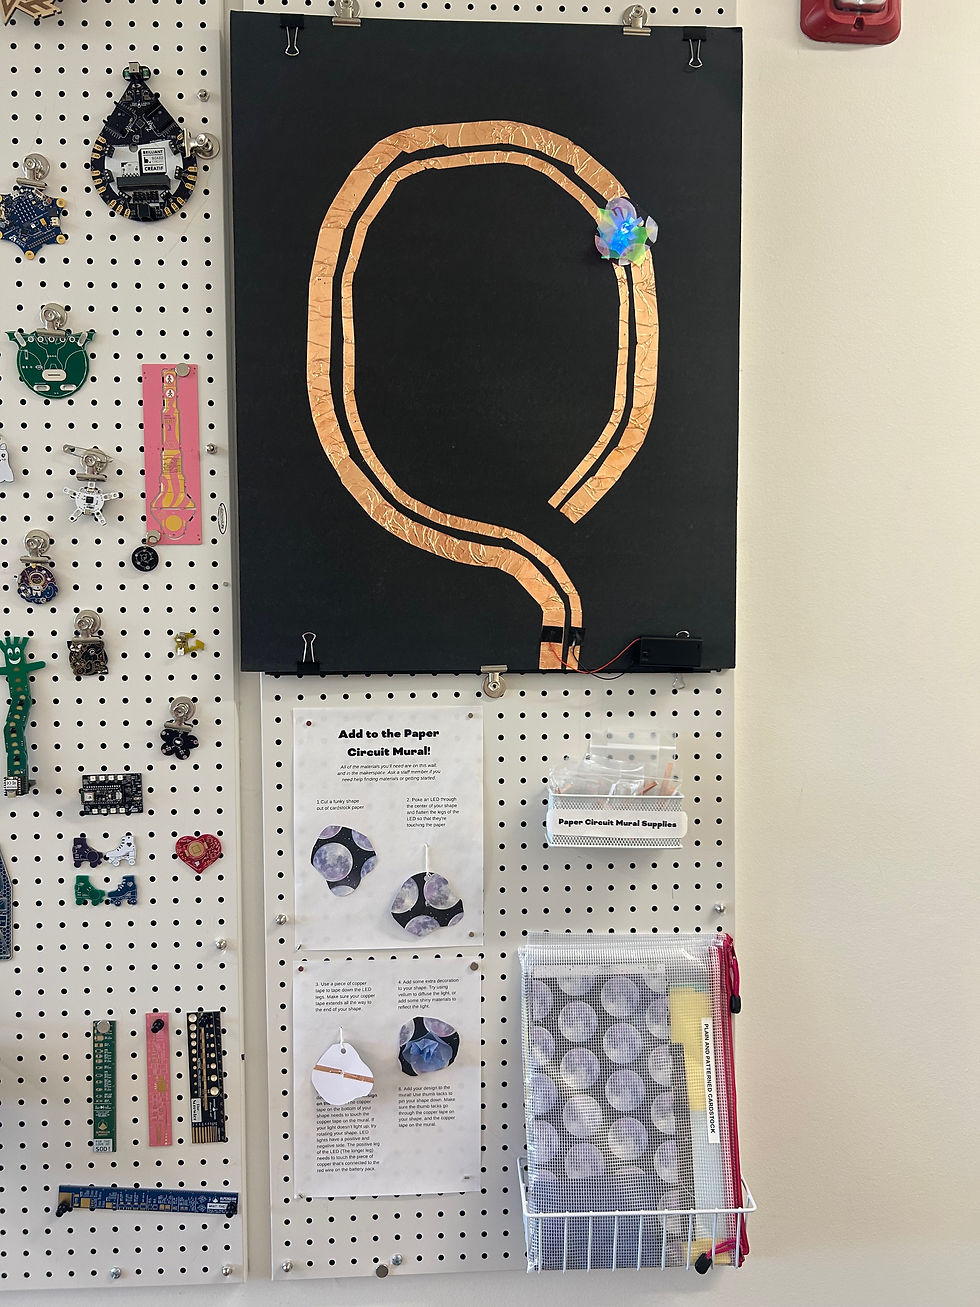
While I love the idea of collaborative art-making and the appearance of a paper circuit mural, this invitation to add a paper circuit to a collaborative mural just didn't land with visitors. In part, this reflects a broader trend we noticed in the makerspaces. Many visitors were there to work on a specific project, and were often uninterested in "Drop-in" activities, or they were just there to look around and tour the space and weren't ready to sit down and make something. It likely would have been more effective to incorporate this activity into a workshop.
What's it all for?
This post highlights the design and curation of the physical environment, but ultimately this is all in service of engaging visitors and community members in creative, meaningful, and enriching experiences with electronics. Here's what the space looks like in use:
Angela Sheehan teaches a wearable electronics program

